
I thought I'd share a quick sewing project for Valentine's Day.
These mini envelopes are so simple to make. Give one to
someone special, or make a few to give to friends.

You will need to print out the pattern:
Envelope Pattern
(after printing, you may want to double check that the pattern measures 4" across)
(after printing, you may want to double check that the pattern measures 4" across)
For the envelope, you will need 3 pieces of fabric measuring
4” x 7 ½”: One for the outside, one for the inside, and one piece of batting. I
used fusible batting, but you can use a scrap of quilt batting or fleece if
that’s what you have on hand.

Cut out the envelope pattern and lay it flat on the fabric
pieces. Use the pattern to trace and cut the points of the envelope.

Fold the pattern on the dotted lines and use a water-soluble
marker to draw the guidelines for the stitching on the front side of the outer
piece. Place the batting on the bottom of the outer fabric piece and then
stitch over those lines using any color thread you choose. I used a deep red.

Now is the fun part! You can embellish your valentine any
way you want. You can even make it into a birthday or graduation theme. For the
Valentine theme, I used pinking shears to cut out a stamp, and stitched a scrap
of lace where the address would go. You can use fabric markers, or cross-stitch
a design. Get creative! Stay inside the rectangular area, and stay within ¼” of
the edge, or your design will not align on the front of the envelope.

After you’ve embellished your envelope, place the outer
fabric and the inner fabric right sides together. Stitch along the outside edge
with a ¼” seam. Leave a gap on the long side about 1 ½”-2” wide.

Trim the
excess fabric from the corners and points, and turn it inside out through the
gap you left. Poke out the corners using a chopstick or a dull pencil. Press
well so that the envelope lies flat.

Turn it over and fold up the bottom of the envelope so that the lowest point
at the bottom is is 4 ½” from the highest point on the top, and press well.

Starting at the bottom of the envelope, stitch all the way
around using a 1/8” seam allowance. Be sure to backstitch at the beginning and
end. I don’t like to use pins, but it may help you keep everything in place.

Now fold over the top of the envelope and press it into place.
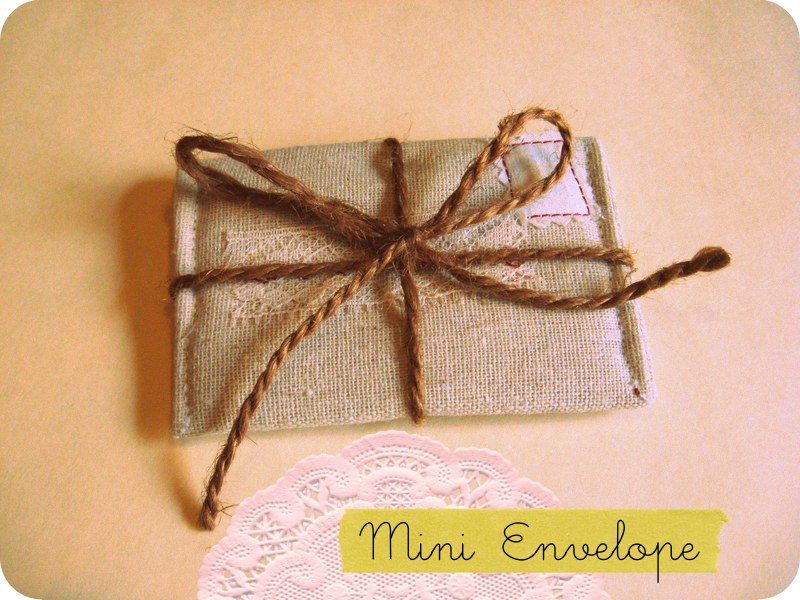
...and you're finished!
You can print out these blank coupons and fill them out with special treats you think your loved one would like.
You could also slip some cash into it if you're making it for a birthday or other occasion.
Have fun with this pattern! I'd love to see your finished products :)
oh my this is ADORABLE!
ReplyDelete